Wednesday, April 29, 2009

Week 14 (2)


New Website - Click Here.

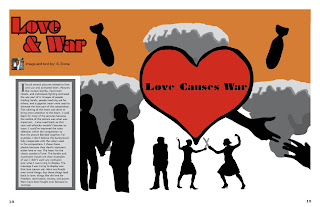
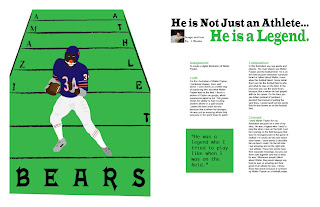
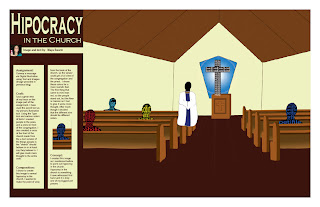
This website contains a welcome page, an about the editor page, and an albums page that links to all of the spreads in the magazine. There are also external links on the pages that link to this blog and the site that people can purchase a copy of the magazine as well. The welcome page gives a description of the magazine, along with a picture of the cover, and two featured spreads of the magazine as well. The about the editor page has a picture of me with a description of my contrabution to the magazine, as well as other information about me as well. The albums page serves as a link to the page with all of the spreads of the magazine. Viewers can also view a slide show of the spreads from this page as well, by clicking the slideshow button.

Monday, April 27, 2009

Week 14


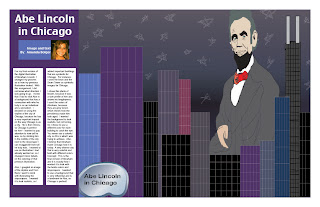
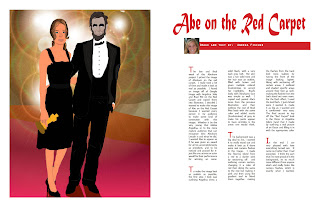
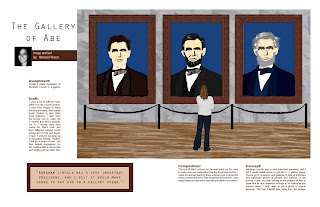
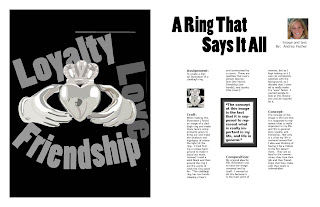
This week we continued to work on our web sites using the IWEB program. We were supposed to try to get away from the format of the website that we were given, to make it mor of our own. I created a banner using a gradient of the colors of pink and yellow to correspond with my magazine, and this banner is present throughout the four pages of the site to give it some uniformity. I randomly placed stars on the pages because of the magazine's title of Star Weekly. I also changed the borders on the pictures that I inserted, and changed the textboxes as well. I also made the album on my albums page to look like a flip scrap book. I tried to have the color scheme of the site remain with pinks and yellows because those are the colors of my magazine's cover. I also sent out my second draft of the magazine last week, so I am still waiting for my final draft to arrive.


Monday, April 20, 2009

Week 13


This week we had a critique on our first draft of our returned magazine. We worked with partners to critique people's magazines and wrote down a list of suggestions that could help with their final draft of their magazine. This week we are supposed to continue fixing the errors of our first drafts of the magazines so that we are ready to send out our final draft next week. In my first draft, some of the things that I needed to fix were the titles of my spreads because some of the fonts were either changed in the process or the drop shaddows did not turn out the way that I wanted them to. Also, in a couple of my spreads the text was cut off by the middle fold of the magazine, so I had to move the image so that the text would be legible. Also, on one of my spreads I had duplicate page numbers because I forgot to delete the first page number after I applied the page numbers of the master spread. I changed the fonts on the cover, so that it looks more like a typical magazine cover with various fonts and sizes of the titles. For the table of contents page and the credits pages I switched the backgrounds to be pink and the letters to be yellow, so that it would correspond with the cover. So far those are the only changes that I have made to my first draft of the magazine. I also plan on going through the text of each spread to make sure that there are no typing errors in the text.

Wednesday, April 15, 2009

Week 12


During this week of class, we continued to work on our covers and table of contents pages on Monday. My first draft of the magazine was also delivered on Monday, so that gave me more time to look through my spreads to see any mistakes or anything that I needed to change for my second draft of the magazine project. This week on Wednesday, we also continued working with the IWEB program to add a slideshow to the other two pages that we created last week. We learned how to create hyperlinks, as well as use the IPHOTO program to insert the JPEG spreads into the IWEB program to create the slideshow/myalbums page. Since I was on a different computer than I originally started on, I had to redo my first two pages (the welcome page, and the about me page) before I was able to move on to create the My Albums page.


Thursday, April 2, 2009

Week 11


Assignment:
This week we had to finalize our magazine spreads and create a table of contents and a credit page for the authors.
Craft:
Process- I created these pages of the magazine by using the same approach that I used to create the previous spreads of the magazine. For these three components I chose to have all three look similar, using the same colors and fonts, to add another component of the magazine that is uniform.
Technique- I improved the spreads by going back to each one and making the font style and font size consistent throughout all of the spreads. I also made some last minute changes to the spreads as well, such as adding the page numbers and completing the last two spreads that were missing from the magazine.
Composition:
For the cover of the magazine I took out the people from my illustration of the beach and used it as the cover image, along with a banner of stars to go along with the magazine's title, Star Weekly. I also took some of the article titles and formed them into headlines for the cover as well. For the table of contents and the credits page I incorporated the stars from the cover into the pages and used the same text through the two pages to make them look similar as well. The two inside pages that I created use the same two text sizes, fonts, and images from the cover on both pages. This helps to bring the magazine together as a whole.
Concept:
The plan for this project from the begining was to make this magazine look like a typical, professional magazine. I feel that I have accomplished this goal by putting everything together this week and adding the last components of the magazine to make it all come together. I now have a finalized version of my magazine project, that looks even better than what I had imagined prior to starting the project.
Also, this week we began creating our web portfolio by first exporting all of our magazine spreads to jpg images. Then we used the iweb program to begin creating a welcome page and an about the author page before we create a slideshow of our spreads for next week's class.

Saturday, March 28, 2009

Week 10


Assignment:
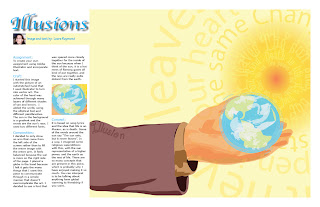
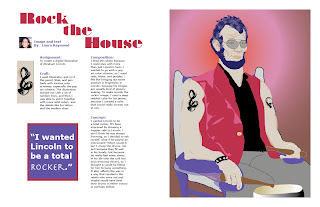
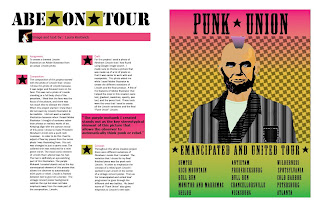
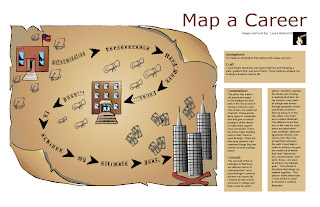
To create 10 more magazine spreads, bringing the running total to 20 spreads.

Craft:
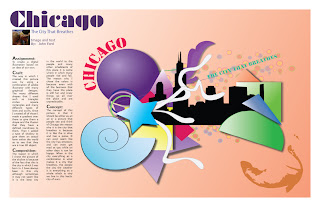
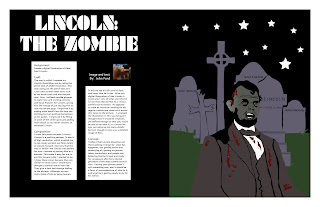
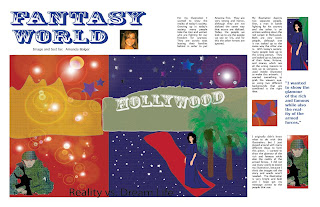
Process- I created the next 10 spreads by using the InDesign program and using different fonts and colors to correspond with the art work of the students in the class. I also went back to the previous spreads that I did and corrected some mistakes that were brought up during the critique, such as the breaking of the words in the block quotes, which I made sure not to do in the spreads for this week.
Technique- For these spreads, I also used several colors that corresponded with the image by using the eyedrop tool. This makes the connection between the image and the text more apparant. Not all of my articles include pull quotes, but the ones that do stand out in the article and also include colors that were in the color scheme of the artwork. I used font titles for the articles that are able to further the message of the work by giving the title some "oomph" to pull the reader into the article as well.

Composition:
The fonts and colors of each individual spread were chosen to work well together, and which were also selected based on the artist's original artwork as well. I arranged the contents mostly in columns, with the exception of a couple of spreads, to make it look like a typical magazine. I noticed that I will need to go back and make each bodytext the same font and size so that the magazine spreads share a common factor throughout, so that the magazine will look like one whole piece instead of 20 separate spreads.

Concept:
The concept for this week is the same as last week, which is to make the spreads all come together to look like a professional magazine. Each spread will eventually share similar characteristics, while exploring differences on each individual spread to make it unique and correspond with the artwork as well.

Wednesday, March 25, 2009

Week 9 (2)


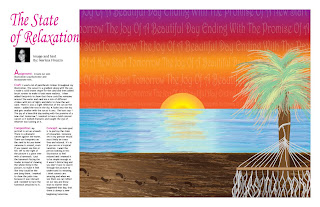
This is my second illustration that now serves as a background for my turtle's tank!!

Tuesday, March 24, 2009

Week 9


Assignment:
To create 8 more magazine spreads, bringing the running total to 10.

Craft:
Process- I created the next 8 spreads by using the InDesign program and using different fonts and colors to correspond with the art work of the students in the class. I also went back and corrected the first two spreads that I created for last week by changing around some things that would not make sense in a magazine.
Technique- For this week I played around with colored text boxes and backgrounds that still allow the reader to easily read the text of the artists. I also added more pull quotes and title fonts that correlate to the artists' message of their work.

Composition:
I chose the colors that I did so that each spread would work well with eachother. The colors of the fonts or backgrounds were chosen to work with the colors in the illustrations. I arranged the contents mostly in columns to make it look like a typical magazine. I also chose pull quotes for some spreads that stood out to me while reading the corresponding text that the artist provided with their artwork.

Concept:
I wanted each spread to look like it was from a professional magazine, so I used several examples while working on each. The columns of the text are just like a professional magazine has, and I also played around with pull quotes, and different positions of both the text and images in order for it to look like a typical magazine.

Monday, March 16, 2009

Week 8


Assignment:
To create the first two magazine spreads using the InDesign program.

Craft:

Process- I created each of the first two spread by first inserting the image into the two page spread to make the image the focus of the pages. Then, I inserted a title and by-line using the text tool. I also inserted the prepared text into the document using columns to look like a typical magazine spread. I used a small font size for the content, so that it would look like a typical magazine article.
Technique- I chose colors and fonts to correspond with the images that were previously inserted. The fonts of the titles were chosen to better represent the message of the images. The columns and section headings of the text are used for the reader to easily read the text.

Composition:

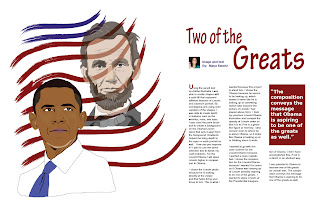
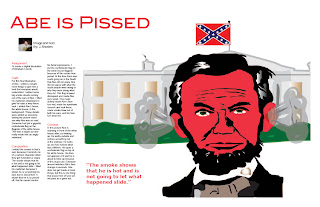
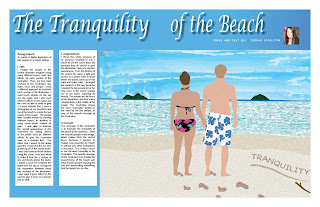
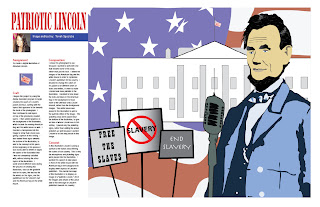
For the beach illustration I chose to use a blue background with white text to correspond with the blue sky and water of the illustration. This was a bold move to make in a magazine spread, because the blue and white combination can sometimes be difficult to read, but I felt that the color scheme went well with the illustration. I inserted the Lincoln illustration into the spread the way that I did because I wanted the image to overpower the text, so that the reader's eye would go directly to the image when they first flipped through this page. I also made sure that the fold did not chop off any important contents of the illustration. The colors of the Lincoln spread also served to portray the patriotic message of the image by using the colors of red and blue for the title and section headings.

Concept:

For both spreads I wanted the images to be the main focus of the spread, so that the reader would notice the image first, and then move on to read the text of the spread.

Thursday, February 26, 2009

Week 7


Assignment:
Digital illustration of two people on a beach setting.

Craft:
Process- I created this project in the Adobe Illustrator program using many different layers, tools and effects for each section of the illustration. There are four main sections of this illustration: sky, water, sand, and people. I used a different approach to complete each section of the illustration. I used brush strokes on the sky and the water, and I also used different effects on the water and the sand as well in order to give it a more realistic feel. The people were created mostly with different layers, in addition to using some brush strokes as well.
Technique- I was able to improve this draft of the illustration by adding different effects to the water to make it look like the sun was glistening off of the ocean. I also changed the sky from a simple gradient to several brush strokes to make it look like a mixture of sky and clouds above the water. I added a solid line between the water and the sky to distinguish the separation between these two sections of the illustration.

Composition:
I chose this photo because of its personal meaning to me. I chose to use the colors that I did because they all served to give this illustration more of a realistic appearance. From the bottom of the picture the sand is light and moves to a darker color to show where the waves come up on the sand and make it wet. I arranged the contents in this way because I wanted the two people to be the only ones in the scene looking out at the water, admiring it's beauty. The people are the focus of this illustration, and that is why I placed them in the middle of the image. I created two variations of this draft of the illustration because I was not sure how to effectively display the message of the "tranquility" of the beach. One version of the illustration shows the word written in the sand by the two people in the illustration, and the other version shows the word written in the clouds that the two people are looking out at.

Concept:
The overall message of this illustration is to show how tranquil the beach is. The two people are the focus of this illustration because the viewer is seeing how peaceful this scene is to the two people in the illustration. This is why there are not any other people on the beach, and that is why I chose to use the word tranquility in this illustration.


----------------------------------------------------------------------------------------------------------


LINCOLN ILLUSTRATION SUMMARY
Assignment:
To create a digital illustration of Abraham Lincoln.
Craft:
Process- I began this project by using the Adobe Illustrator program to begin creating the layers of Lincoln's jacket and face, starting with the layers that appeared to be towards the back of the photograph. I then continued to add layers on top of the previously created layers. I then added graphics to the background of the illustration, which include the waving American flag and the white house as well. I inserted a microphone into the image to show that Lincoln was giving a speech in this setting. I also added three signs towards the bottom of the illustration, to add to the concept of this piece.
Technique- At the beginning of this process I was easily able to delete or adjust the layers of the illustration that i was not completely satisfied with, without altering the other layers of the illustration. I used several different tools during the process of creating this illustration, such as the gradient tool for his eyes, the text tool for the words on the signs, and the paintbrush tool for Lincoln's hair and the American flag on the white house.
Composition:
I chose this photograph to use because I wanted to work with one that showed some of his body, rather than just his face. I added the images of the American flag and the white house in order to symbolize Lincoln's patriotism for his country. I decided to change the colors of his jacket to be different tones of blues and whites, in order to make Lincoln look more patriotic in the illustration. I decided to tone down the reds and blues in the American flag in the background to focus more of the attention onto Lincoln himself, rather than the background images. The white house was placed in the illustration to add to the patriotic effect of the image. The picketing sings were placed near the bottom of the illustration, to give an idea of where Lincoln was in this setting. I placed only the picketing signs, rather than adding the actual picketers as well because I wanted Lincoln to be the only person in this image.
Concept:
In this illustration Lincoln is giving a speech to the nation about freeing the slaves of our country. This is why the microphone and picketing signs were placed into the illustration. I wanted this speech to take place in front of the white house with the American flag in the background to display other aspects of Lincoln's patriotism. The overall message of this illustration is to display an image of a "patriotic Lincoln." All of the images and details of this piece add to this message of Lincoln's patriotism towards his country.

Monday, February 23, 2009

Week 6

Assignment:
Second illustration of the course. Choose something that makes you happy/sad and create an illustration based off of that idea.

Craft:
Process- I took a photograph of my boyfriend and I at the beach and created an illustration of our bodies using several layers. Then, I found a picture of a beach scene on the internet that caught my attention and created the illustration of the beach background, which is the setting of the illustration.
Technique- I improved the overall appearance of this illustration by adding details to the photo such as different effects to give the illustration a more realistic feel. Also, there are many details on the two people in the illustration as well, such as their hair, skin, and clothing. I think that the grain effect on the sand gives it a very realistic feel, which was exactly what I was looking for.

Composition:
I chose this photograph because it is a picture of myself from something that I have experienced in my life. I chose the background that I did because going to the beach is my favorite thing to do. I wait all year for the first day that it's warm enough to go to the beach! There is something so calming and peaceful about the beach, and that is why I chose to only incorporate two people into the illustration. I wanted them to be the only two people on that beach to play up the word usage of tranquility that I chose to use here. I incorporated the word tranquility into the photo by making it seem like one of the two people wrote the word in the sand with the stick that was near the word.

Concept:
The message that I was going for in this piece was to translate the tranquility of the beach to the audience. There are only two people in this illustration to display how peaceful it can be. There are no distractions in this illustration because I wanted the focus of the piece to be the two people enjoying the day and appreciating everythign that the beach has to offer.

Tuesday, February 17, 2009

Week 5


Idea for project #2

My favorite thing to do during the year is to go to the beach. I wait all year long for that first day that it's warm enough to make the drive to Indiana to spend the day at the dunes. So, this is the setting that I would like to use for the second project that we have to create. I have a picture that was taken two summers ago of my boyfriend and I standing in the sand at the beach looking out onto the water (pictured to the right). My idea is to use this image along with the beach setting that I talked about above with also adding a sunset into the background to create my next illustration. I would incorporate text into this illustration by creating text along the border of the sunset using words that go along with the beach scene.


Monday, February 9, 2009

Week 4


Assignment:
Digital Illustration of Abraham Lincoln including background graphics.

Craft:
Process- I used the "Patriotic Lincoln" version of my illustration to move on to this draft of the project. I used a wavy American flag for the background of the illustration to play up the patriotic aspect of the illustration. I also added the white house to the background of this illustration and added a microphone close to Abe and three picketing signs protesting slavery as well.
Technique- I enhanced some of the details of Lincoln, including the colors on his face and adding more detail to his hair. I also changed up his eyes in order to make them pop from the color usage of his jacket. The added details of the white house, microphone, and signs add a lot to this illustration because people will now be able to percieve a story from the illustration rather than just Abe's body that was in my first few drafts.

Composition:
Since I chose to move on with my "Patriotic Lincoln" illustration I needed to add images that symbolized his patriotism for his country. I chose to use watered down colors of reds and blues for the flag in the background in order for Lincoln to still stand out from the background of the flag. I placed the picketing signs down below because I wanted to display the message that the people were trying to send without showing them because I wanted Lincoln to be the only person in the illustration. I included the white house in the illustration because that one of the icons of the president and also an icon of Lincoln's patriotism.

Concept:
I wanted the illustration to display the message that Lincoln was giving a speech to his country about ending slavery. I wanted this speech to take place in front of the white house with the American flag in the background to display another aspect of patriotism. Even though microphones were not invented until after Lincoln's time and there was probably not a lot of picketing that went on around that time, I wanted to give this illustration more of a modern feel while displaying the message of "Patriotic Lincoln."


Tuesday, February 3, 2009

Week 3


Assignment:  
Digital illustration of three variations of Abraham Lincoln.

Craft:
Process- I started this week's project by taking the first draft that I constructed from last week and changed it up in three different ways to produce three variations of my first draft.
Technique- I changed the colors and details of the photos along with the backgrounds and adding new techniques such as the gradient tool as well. Each variation of the illustration has different details of Lincoln's face and different details of his jacket and background as well.

Composition:
**Note that the illustrations to the right are in the opposite order of the descriptions below**
#1- For the first variation of Lincoln, I had the vision of making him "Patriotic Lincoln." I changed the colors of his jacket to different shades of blue and his undershirt to a bright white as well. I also changed the color of his eyes to a blue tone to make them stand out. I used a gradient background of red and white to incorporate those colors of the flag into the illustration.
#2- In the second variation of Lincoln, I wanted it to be "Distressed Lincoln." I had the vision of making him look like it was his last day of office, and I wanted to show the exhaustion on his face and how much of a toll the presidency took on him. His face is very pale and there are a lot of wrinkles and other details on his face to make him look aged.
#3- For the third variation of Lincoln, I wanted him to look like "Classic Lincoln." The circular gradient background gives it the look of a photograph and that went very well with my theme for the illustration. I also changed the strokes of his hair and the details of his face to go along with the picture as well. I also changed the shape of his eyes to give them more of a classic look as well.

Concept:
For next week I have chose to go further with the "Patriotic Lincoln" variation. For this photo I plan to incorporate the flag and the whitehouse some how and to maybe have him be making an inspirational speech to his country.

Tuesday, January 27, 2009

Week 2

Assignment:
Digital illustration of Abraham Lincoln

Craft:
Process- In order to complete this project I started by using the Adobe Illustrator program to begin creating the layers toward the back of the photograph and then continued to add layers on top of those until the vector art piece was completed.
Technique- I was able to improve this piece very easily because if I created a layer that I was not completely satisfied with I was able to delete that layer and redo it without altering the other layers that I had already done. For example, it took me several tries to get his eyes to look the way that I wanted them to. I was able to improve my work by going back and deleting the layers of his eyes and starting over on just that specific section of his face.

Composition:
I chose this photograph because I wanted to work with one that showed more of his body than just his head. I chose these colors because they were the closest ones that i could find to the actual colors in the photograph that were also able to put a unique spin on the picture. I arranged the contents of the piece in the way that I did because it was easier to start the piece from working with the layers from the back of the photo and then creating layers on top of those ones in order to show more detail in the photo. For example, for his jacket I first started with the basic outline of the jacket, and then I was able to create the unique details of his jacket such as the buttons or the creases in the jacket over the basic layers that were previously created.

Concept:
After carefully studying Lincoln's facial expression in this portrait, I think that he should be placed in an office setting. It is apparent to me that he is deep in thought, and it would make sense to me to place this portrait of him in an office setting because that was most likely where he was deepest in thought and made the difficult decisions regarding our country.

Monday, January 12, 2009

Week 1


ASSIGNMENT:
set-up blog

CRAFT:
Supplies- a photo of myself, a computer, the internet.

Step 1- get or confirm gmail account
Step 2- login to blogger.com
Step 3- create blog


COMPOSITION:
Why this photo?
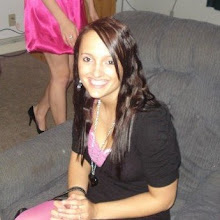
I have always liked this picture of myself and I think it can serve as a practical representation of myself.
Why this template? 
My favorite color is green, so I chose this template in order to reflect my personality.

CONCEPT:
Who, what, where, when, why, and how?

I am Terrah Spoolstra.
Spending time with my friends and family makes me the happiest.
I am planning on becoming an Elementary Education teacher after graduation from Saint Xavier University.
I was last tested during last semester when I had to take the Basic Skills test in order to be accepted to the university's school of education.
I keep doing this because I have goals that I have set for myself that I strive to accomplish in my future.
I get what I want by knowing exactly what I want for myself in my life and setting goals for myself in order to accomplish everything that I have set out for myself.